How to use VeraId
Using VeraId is—we hope—very easy!
Verify signatures
To verify VeraId signatures, there’s absolutely no user interaction needed. All you need is an app implementing a VeraId service!
Produce signatures
To produce VeraId signatures, you just need to follow the instructions from your VeraId-compatible app. Every app will handle this differently.
For example,
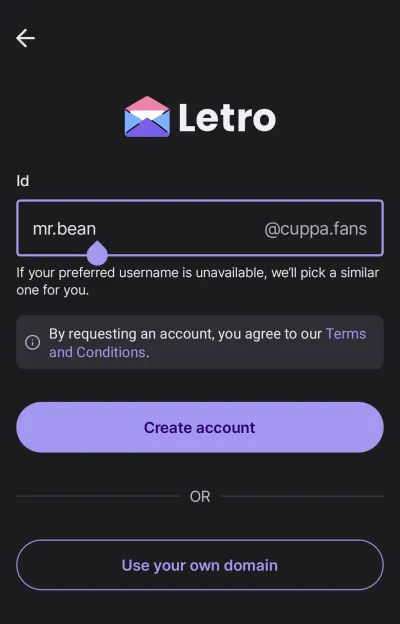
Letro offers the ability to get free identifiers from domains such as applepie.rocks and cuppa.fans,
with minimal configuration as shown in the screenshot below.
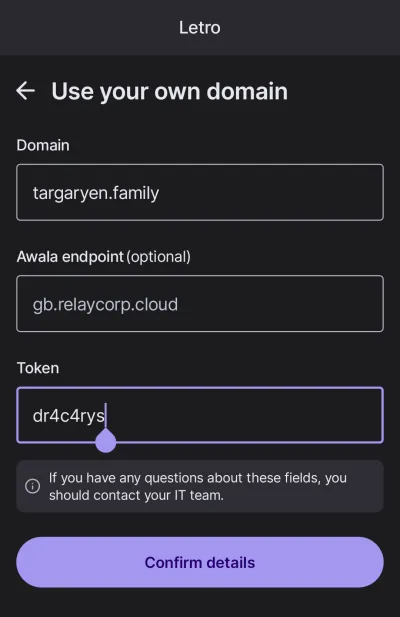
Letro also integrates with VeraId Authority to enable users to use their own domain names. The screenshot below shows what the user should provide to use their own domain name; this information should be provided by the operator of VeraId Authority, as described below.
After this initial setup, the app can automatically produce signatures without further user intervention!
Issue member ids under your own domain name
To enable VeraId for your domain name, you need to:
- Enable DNSSEC on your domain, if you haven’t already. Use DNSSEC Analyzer to verify that your domain is correctly configured.
- Deploy VeraId Authority. (FYI, we will offer a SaaS version. Stay tuned!)
- Configure your domain name and member(s) in your VeraId Authority instance.
- Create the necessary
TXTrecord.
Once VeraId is enabled for your domain, you can integrate it with any end user app implementing a VeraId service. This process depends on how the service uses VeraId, so you have to refer to the documentation of the service. For example, in a service like Letro, where users are able to produce signatures offline, you’d need to do the following with each member:
- Create a member under the organisation in your VeraId Authority instance, if you haven’t already.
- Generate a public key import token for the member on VeraId Authority. This would generate a single-use, pseudorandom string that can be used to import the member’s public key (eventually used to issue the member certificate). For security reasons, you must specify the service to which the eventual member certificate will be bound; refer to the documentation of the service to obtain this value.
- Securely share the import token with the member.
- Have the member enter the token in their VeraId-compatible app, as shown in the screenshot above. Internally, the app will take care of generating the member’s key pair, importing the public key using the token, obtaining the member id bundle (containing the member’s certificate) from VeraId Authority, and periodically renewing the bundle.
At the moment, any interaction with VeraId Authority must be done via the API or its JS client, but we plan to offer a UI in the future.
Note that, theoretically, the use of VeraId Authority is optional. We built it to facilitate the operation of VeraId in organisations, but it is conceivable to use a VeraId library to build a different mechanism to manage VeraId certificates. For example, someone could build an Android app to play the role of VeraId Authority without any servers, which might come in handy for personal use.